Assigning an Assay Status
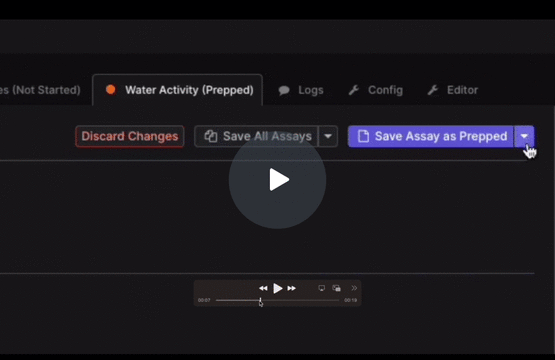
- In the sample page or under the desired assay tab, select the drop down for “Save All Assays” or “Save Assay as…” to select the the appropriate assay status
- “Save All Assays” will assign all of the assays for that sample under a status
- “Save Assay as…” will assign a status for that particular assay

Assay Status Icons - Watch Video
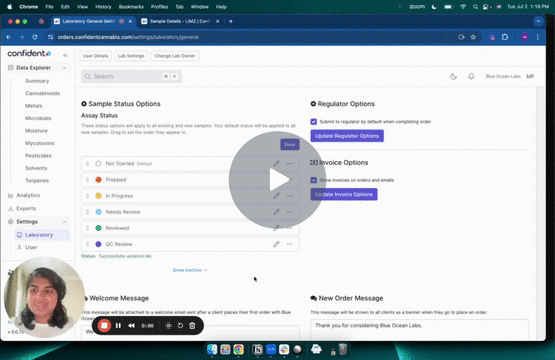
Customizable Assay Statuses (Pro and Premium Labs)
- Assay Statuses can be created or customized in Settings → Laboratory → General under Samples -> Assay Status
- To edit or change the color of a Status, select the pencil icon
- To create a new Status select New
- Create the name of the Status and assign a color to the Status
- Save the Status
- The status will now be available to select or samples as described above
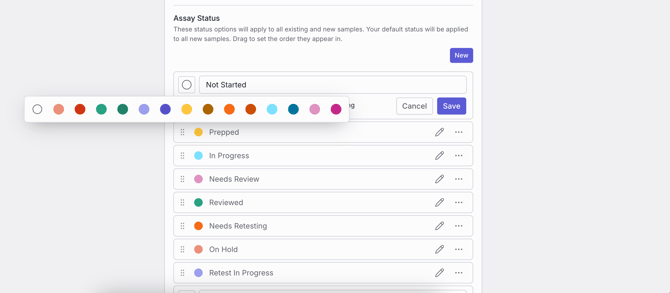
Pro Tip: Defaults can be set for new samples and when results are imported by selecting the pencil icon or the three dots next to a status. See the article How do I Bulk Import Data? for more information on auto-assigning statuses when importing data.

Assay Status Options - Watch Video