![64d9e16fc8e3963295162d90_logo.svg]](https://help.confidentlims.com/hubfs/64d9e16fc8e3963295162d90_logo.svg)
If you are interested in setting up an importer based on your Lab's internal spreadsheets or instrument export files, reach out to support@confidentlims.com to get started.
In This Article
- Importing Data Using the Uploads Importer
- Importing Data Using the Array Importer
- To Manually Apply an Importer Data Set in the Sample Page
- Auto-Applying Assay Statuses When Importing Data
- Troubleshooting Tips
Importing Data Using the Uploads Importer
- Navigate to Importers → Upload Files
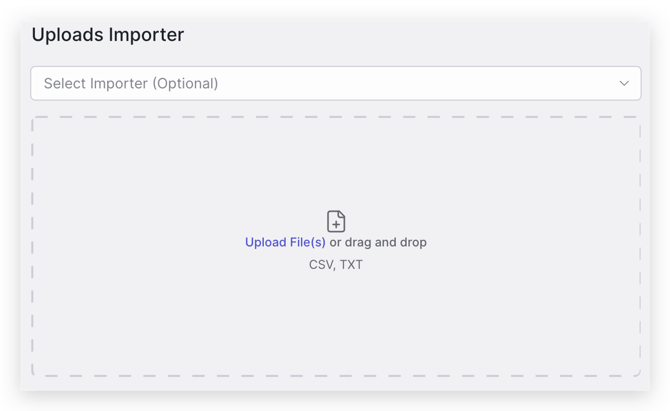
- Select the file format being imported from the Uploads Importer drop down menu
- Click to upload the file(s) or drag and drop the file(s) to upload
- Check the box(s) next to the File Name(s) and click Import Selected
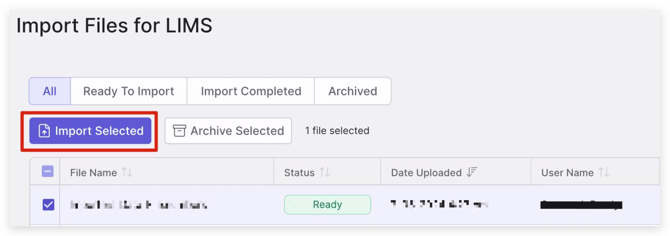
- A message will appear that the import was successful
Note: Multiple files can be uploaded and imported at once!
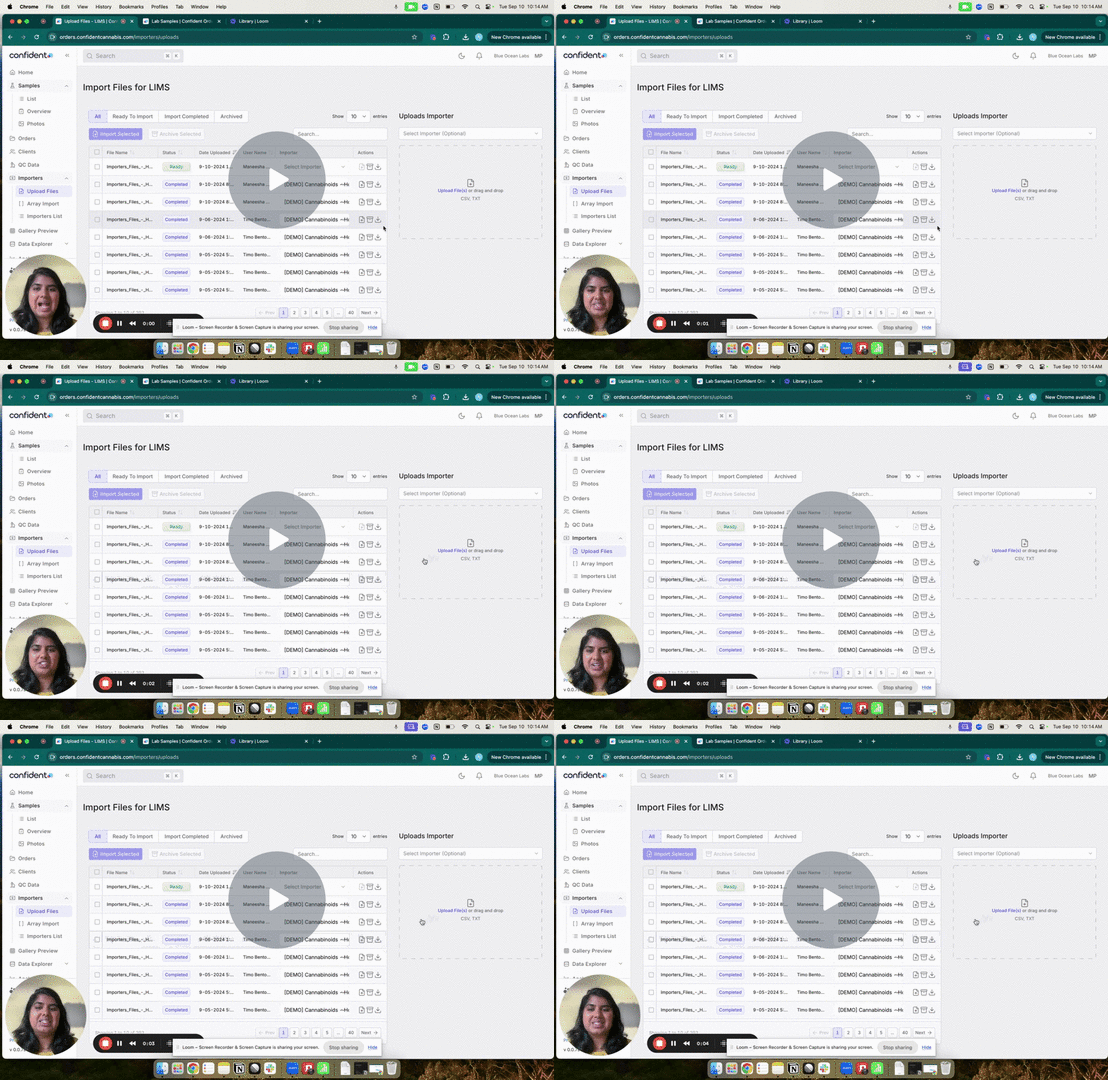
Importing Data Using the Array Importer
- Navigate to Importers→ Array Import
- Select the file format being imported from the Select Importer drop down menu
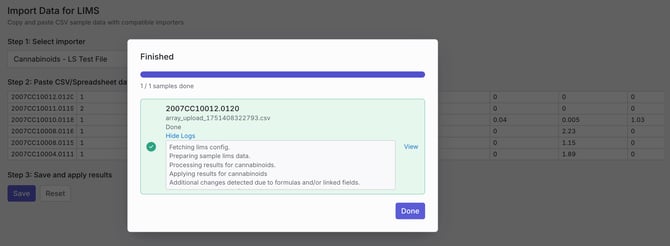
- Copy data from your spreadsheet or file and paste into the Paste Field, click Save
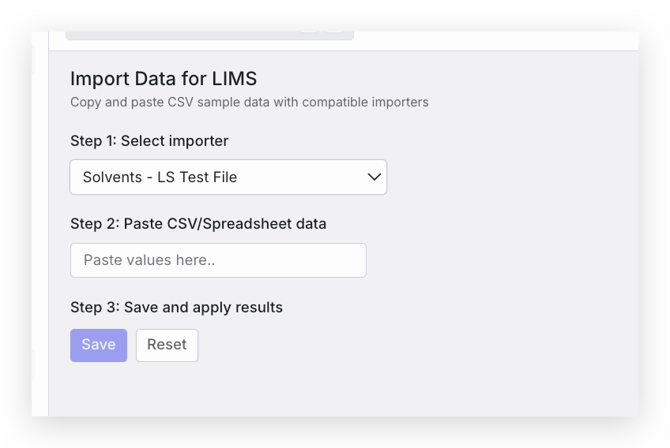
- A message will appear that the import was successful
To Manually Apply an Importer Data Set in the Sample Page
- Navigate into a Sample ID associated with the data that was imported
- Click Importer Results→ Apply All Results in the drop down menu or select the individual file you would like to import
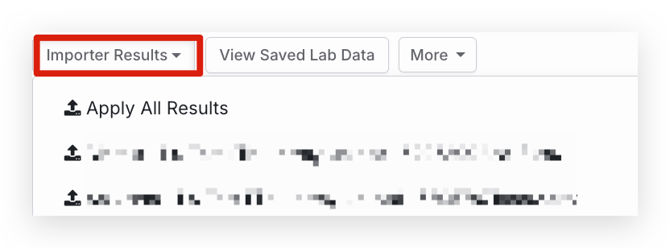
- Once data has loaded into the sample page and assay tab, save the applicable assays. Your data is now ready for report generation!
Auto-Applying Assay Statuses When Importing Data
- For more information on how to assign Assay Statuses for samples, refer to the article How do I assign an assay status to a sample?
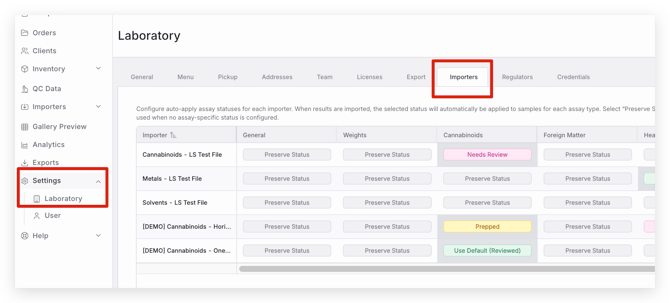
- To set up Importers to Auto-Assign Assay Statuses when data is uploaded, navigate to Settings -> Laboratory -> Importers
Alternatively, these settings can be accessed in the Importers module by selecting Importer Settings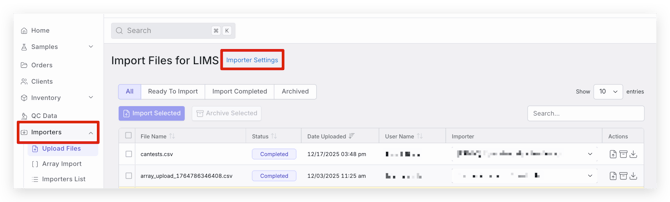
- Once in the Importer Settings page, there is a table that lists all importers your lab currently has configured and a table of assay categories
- To set a status to be auto-applied when importing data, find the Importer you would like to have an assay status auto-applied for and the relevant assay categories associated with that importer configuration
- Select the Status button in the table to set the desired Assay Status
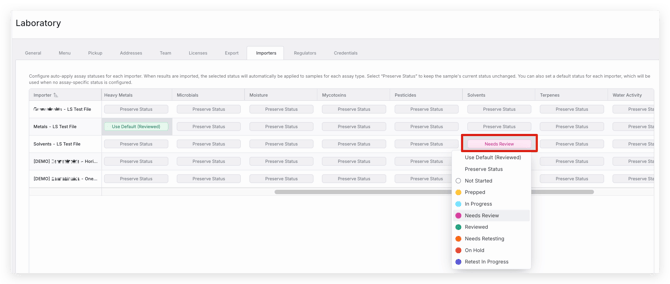
'Use Default' will use the default status selected for importing in your Assay Status settings. Navigate to Settings -> Laboratory -> General to set a default importing status. Scroll down to Assay Status settings and select the Pencil icon or three dots for the status you'd like to set as a default.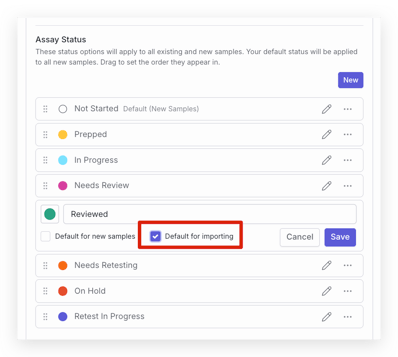
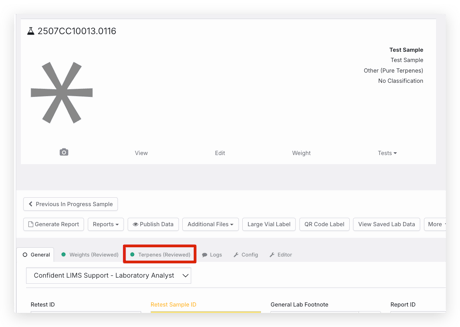
'Preserve Status' will not update an assay status when data is imported. The status will be saved as the current status already applied to the assay for that sample. - Once setting up which Assay Statuses you would like applied when uploading data for each importer configuration, you will see those statuses reflected in the sample page when data is imported for a sample.
Troubleshooting Tips
If you are experiencing errors or data does not seem to be importing for samples, it is likely due to one of the following reasons.
- The full Confident sample ID is not present in the file or there is a mistake in the sample ID listed. If the full Confident sample ID is not present or there is a typo this will cause the sample data to not populate into the sample page.
- Check that the file being used is in the correct format for the importer that was configured, for example a spreadsheet is a CSV UTF-8 format rather than .xls. If the file is in a different format, the importer will not work as expected.
- Check that the file format being imported matches the file that was originally submitted to configure the importer. If the data location within the file or headers are modified once the importer is configured, the importer will not work and will need to be updated. Reach out to our support team if you have had updates to the file format or template being used.
- Check that all analyte names and headers are correctly spelled, as this can cause the importer to not function. Importer configurations typically search for specific analyte names and headers, so if these do not match the configuration the import may be unsuccessful. Similarly, check to see if there is a space before or after an analyte name, any headers, or results as this can cause issues as well.
- If dates are not importing, check the formatting of the date in the file. Dates must be in MM-DD-YYYY or MM/DD/YYYY format to be successfully imported.